Nesting Box Installation Guide Insights for September
Watching nature cure itself is nothing short of inspiring. I’ve always felt a deep respect for the way ecosystems heal when given the right chance. Installing nesting boxes is one practical, hands-on way we can support this healing and help bring wildlife closer to our homes and communities.
In this guide, I want to walk you through why nesting boxes matter, how to install them correctly, and the best practices for keeping them safe and welcoming for birds and other wildlife. Whether you’re a seasoned conservationist or simply someone who loves listening to bird songs in your backyard, this guide is for you.
Why Nesting Boxes Make a Difference
Natural nesting sites like old trees, cavities, and thick shrubs are disappearing fast due to urban development, deforestation, and changing land use. Many species struggle to find safe places to raise their young.
That’s where nesting boxes come in. They provide secure, artificial homes that can help increase local bird and small mammal populations. Beyond benefiting wildlife, these boxes also let us witness the wonders of nature up close.
Installing nesting boxes supports:
- Biodiversity by offering nesting sites for species with limited options
- Pollination and pest control through healthy bird populations
- Environmental education and community engagement
- Strengthening ecosystems that contribute to climate resilience
Every box you install is a step toward restoring balance in your local environment.
Key Steps to Installing Nesting Boxes in September
Timing matters. September is a great month to prepare nesting sites ahead of the next breeding season, giving birds and small mammals time to find and settle in.
Here’s a step-by-step guide to setting up your nesting boxes correctly:
1. Choose the Right Nesting Box
Species vary in their preferences. Some like small, snug spaces; others prefer larger cavities. Doing research on the local wildlife will help you select the correct box size and shape.
Factors to consider:
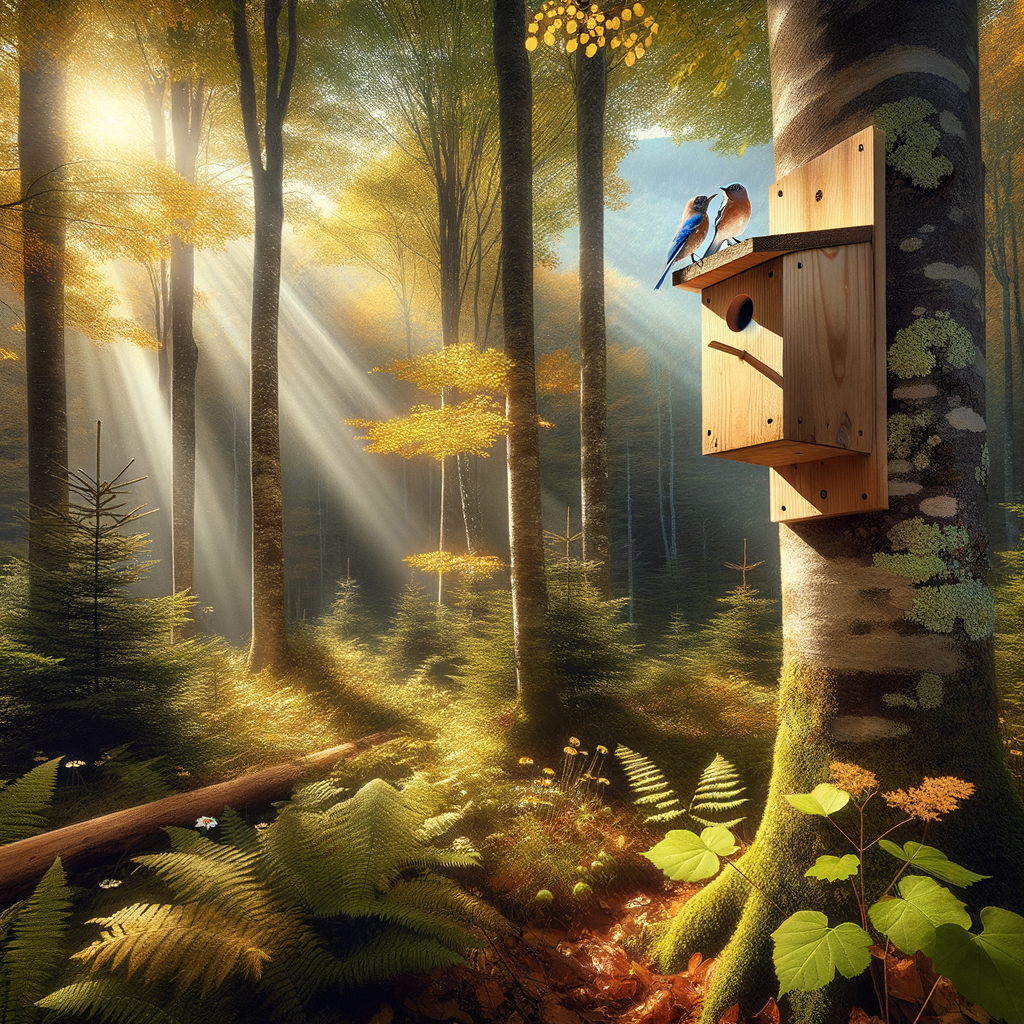
- Entrance hole diameter: Determines which species can enter. For example, chickadees prefer holes about 1.25 inches wide; bluebirds need about 1.5 inches.
- Box depth: Enough space is needed for chicks to grow without falling out.
- Materials: Untreated wood is best for durability and safety.
- Ventilation and drainage: Proper airflow and water drainage prevent mold and overheating.
2. Pick the Ideal Location
Location is critical for success. A well-placed box increases chances that wildlife will use it.
Tips for location include:
- Height: Mount boxes 5 to 10 feet off the ground to deter predators.
- Sun exposure: Avoid direct, harsh sunlight, but ensure some warmth during cooler months.
- Protection: Place boxes near shrubbery or trees, but avoid heavy foliage that blocks access.
- Distance from human activity: Too close to busy areas can scare wildlife away.
3. Installation Process
Secure mounting is essential to prevent boxes from falling or twisting.
- Use screws or sturdy hooks to mount boxes securely to trees or poles.
- Avoid nailing directly into living trees to reduce damage.
- Ensure the box faces away from prevailing winds to provide shelter.
- Check stability twice before finishing.
4. Regular Maintenance and Monitoring
Simply installing nesting boxes is not enough.
- Clean boxes annually, preferably in late fall or winter, to remove old nests and parasites.
- Repair any damage and replace worn parts promptly.
- Monitor occupancy and note species using your boxes for local wildlife records.
- Keep cats and other predators away from the vicinity.
Common Challenges and How to Overcome Them
Installing nesting boxes comes with some hurdles.
- Predation: Coyotes, cats, raccoons, and even squirrels may threaten eggs or chicks. Installing predator guards or baffles helps.
- Competition: Sometimes invasive species or aggressive birds can take over the boxes. Keeping multiple boxes can alleviate this.
- Weather conditions: Extreme heat or cold may harm inhabitants. Proper ventilation and insulation can mitigate this.
- Incorrect placement: Boxes placed too low or in open, windy spots often go unused.
Patience and observation make all the difference. Over time, you’ll learn what works best for your area.
My Experience Installing Nesting Boxes
I started putting up nesting boxes five years ago. The first box was for bluebirds because they face habitat loss in many areas.
I remember carefully researching the right box dimensions, then installing it on a quiet fence post near some bushes. At first, no birds seemed interested. Months passed.
Then, one early spring, I noticed a pair of bluebirds investigating. Soon enough, I heard the signature chirps of tiny chicks. That moment of seeing life flourish because of a simple box stuck with me.
Since then, I’ve installed boxes for chickadees, wrens, and even bats. Each project taught me more about local wildlife behavior and the importance of ongoing care.
Why September Is the Best Time to Install Nesting Boxes
Many people think nesting box installation needs to happen in spring. But September offers some unique benefits:
- Preparing boxes in September gives birds and animals plenty of time to discover their new homes before breeding season starts.
- Less disturbance happens in fall and early winter, allowing boxes to settle safely in place.
- Early installation enables timely maintenance before usage.
- It’s a quieter time for volunteer groups or conservation projects to install multiple boxes with minimal public interference.
How You Can Get Started Today
You don’t need to be an expert to make a difference:
- Purchase or build nesting boxes tailored to local species.
- Follow site selection and installation best practices.
- Join local conservation groups to participate in coordinated efforts.
- Educate neighbors and friends about the importance of wildlife-friendly spaces.
- Keep records of observations and share with wildlife monitoring organizations.
Each step contributes to healthier ecosystems and stronger connections between us and the wild.
Final Thoughts
Nesting box installation is a simple yet powerful action anyone can take to help wildlife thrive. These little shelters bridge the gap between disappearing natural habitats and the survival of many species.
Remember this: when you install a nesting box, you are not merely setting up a structure. You are making a commitment to nurture life and foster resilience in the natural world around you.
September is the perfect time to roll up your sleeves and get involved. After all, every small box can create a big impact.
I hope this guide inspires you to install your own nesting boxes this September. Feel free to share your experiences or ask questions in the comments below. Let’s work together to make the world friendlier for the birds and wildlife we all cherish.